Advanced Settings
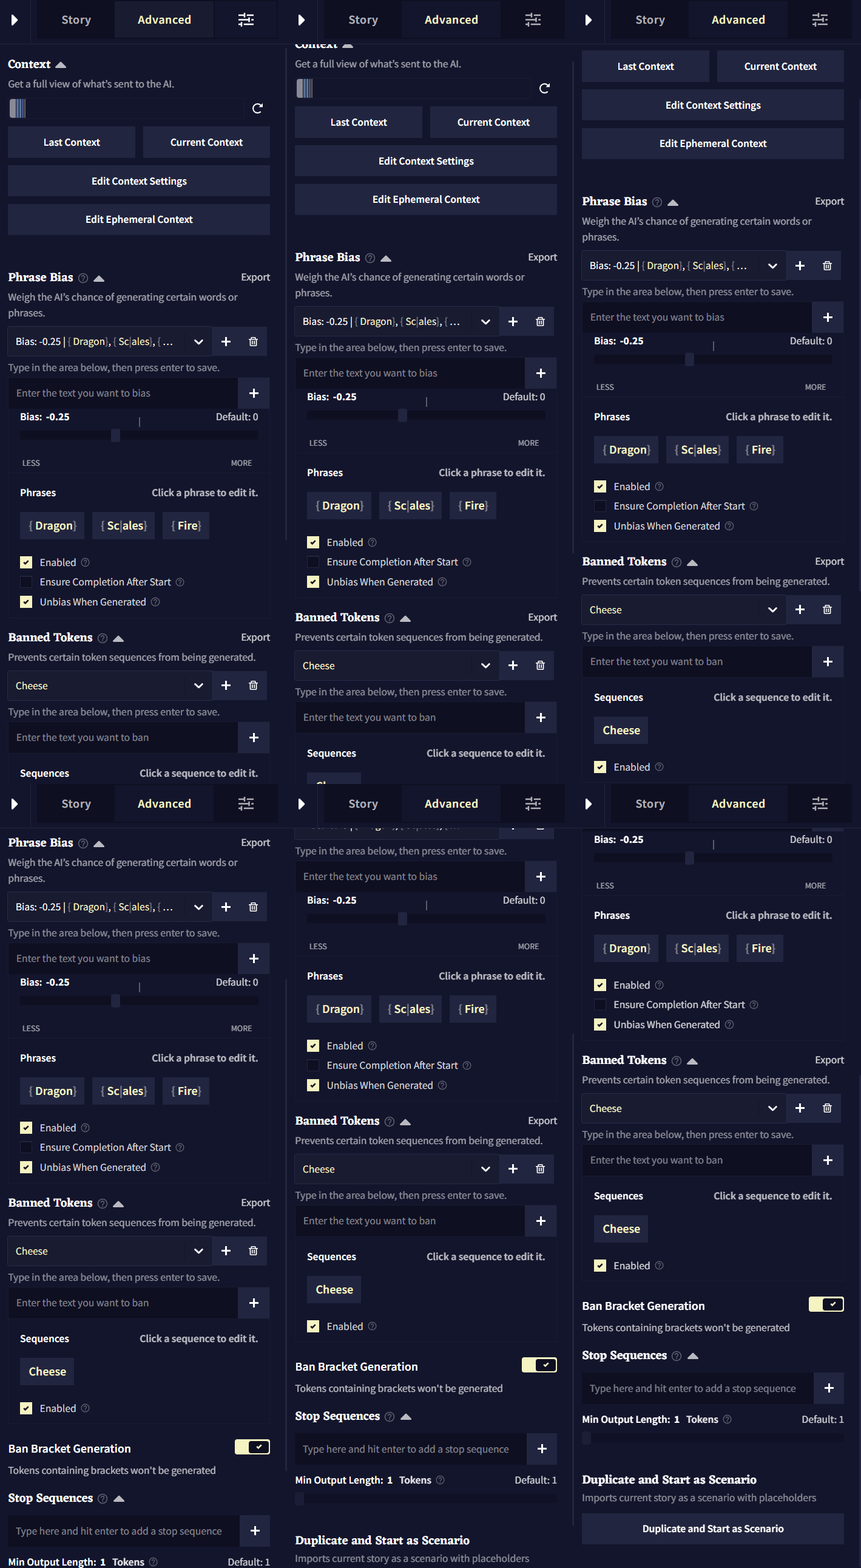
The Advanced Settings tab contains all of the options pertaining to your Story Context and more! It might seem a bit overwhelming at first, but understanding and controlling Context, as well as the Phrase Bias and Banned Tokens features, are all powerful ways for you to guide the AI.
- Context
- Phrase Bias
- Banned Tokens
- Ban Bracket Generation
- Stop Sequences
- Duplicate and Start as Scenario
Context
Context is how your NovelAI story is shown to the AI when generating outputs. The Context section of the Advanced tab lets you view how it looks in detail, as well as adjust settings for it. Ephemeral Context is also located here, an advanced method of creating delayed or timed context entries.
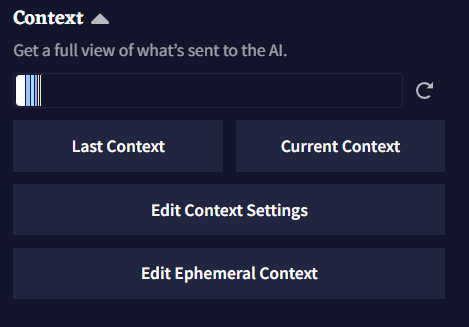
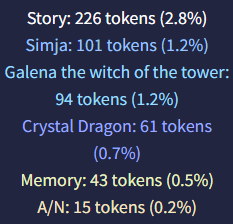
The Context Bar at the top of the tab shows a breakdown of all the text within your most recently used Context, colored based on origin. Hovering over each section of the bar displays a box of more detailed information, such as token counts and what percentage of context each entry takes up!
 |
 |
Goose Tip: The Context Bar represents how much of the AI's 'brain' is available to use, as well as how much of it is taken up with information. Your maximum context limit depends on your Subscription tier.
Selecting Last Context or Current Context opens the Context Viewer and shows you a full breakdown of your story context. Check the Context Viewer section below for more information.

The Edit Context Settings button opens the Context Settings window, which allows you to determine how sections of your story context are budgeted, positioned, and trimmed within your Context limit. Check the Context Settings section below for a full breakdown.

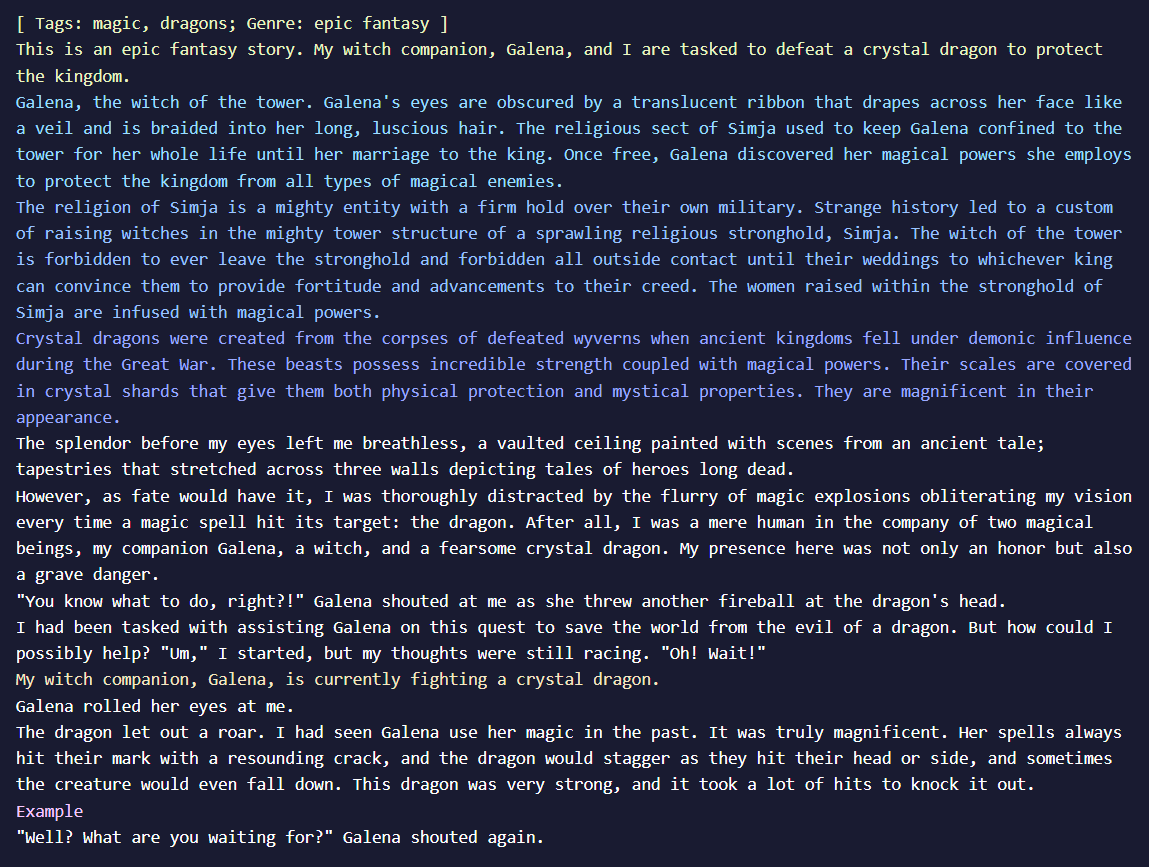
Ephemeral Context can be used to create context entries that can be delayed and timed based on your current Story Step, which is visible under View Story Stats in the Story Settings Tab. See the Ephemeral Context section below for a more in-depth explanation and an example.

Goose Tip: Depending on your settings, Context and Lorebook entries can cancel out story text and vice versa. You can use the Context Viewer to take a peek at how everything in your story is working.
Context Viewer
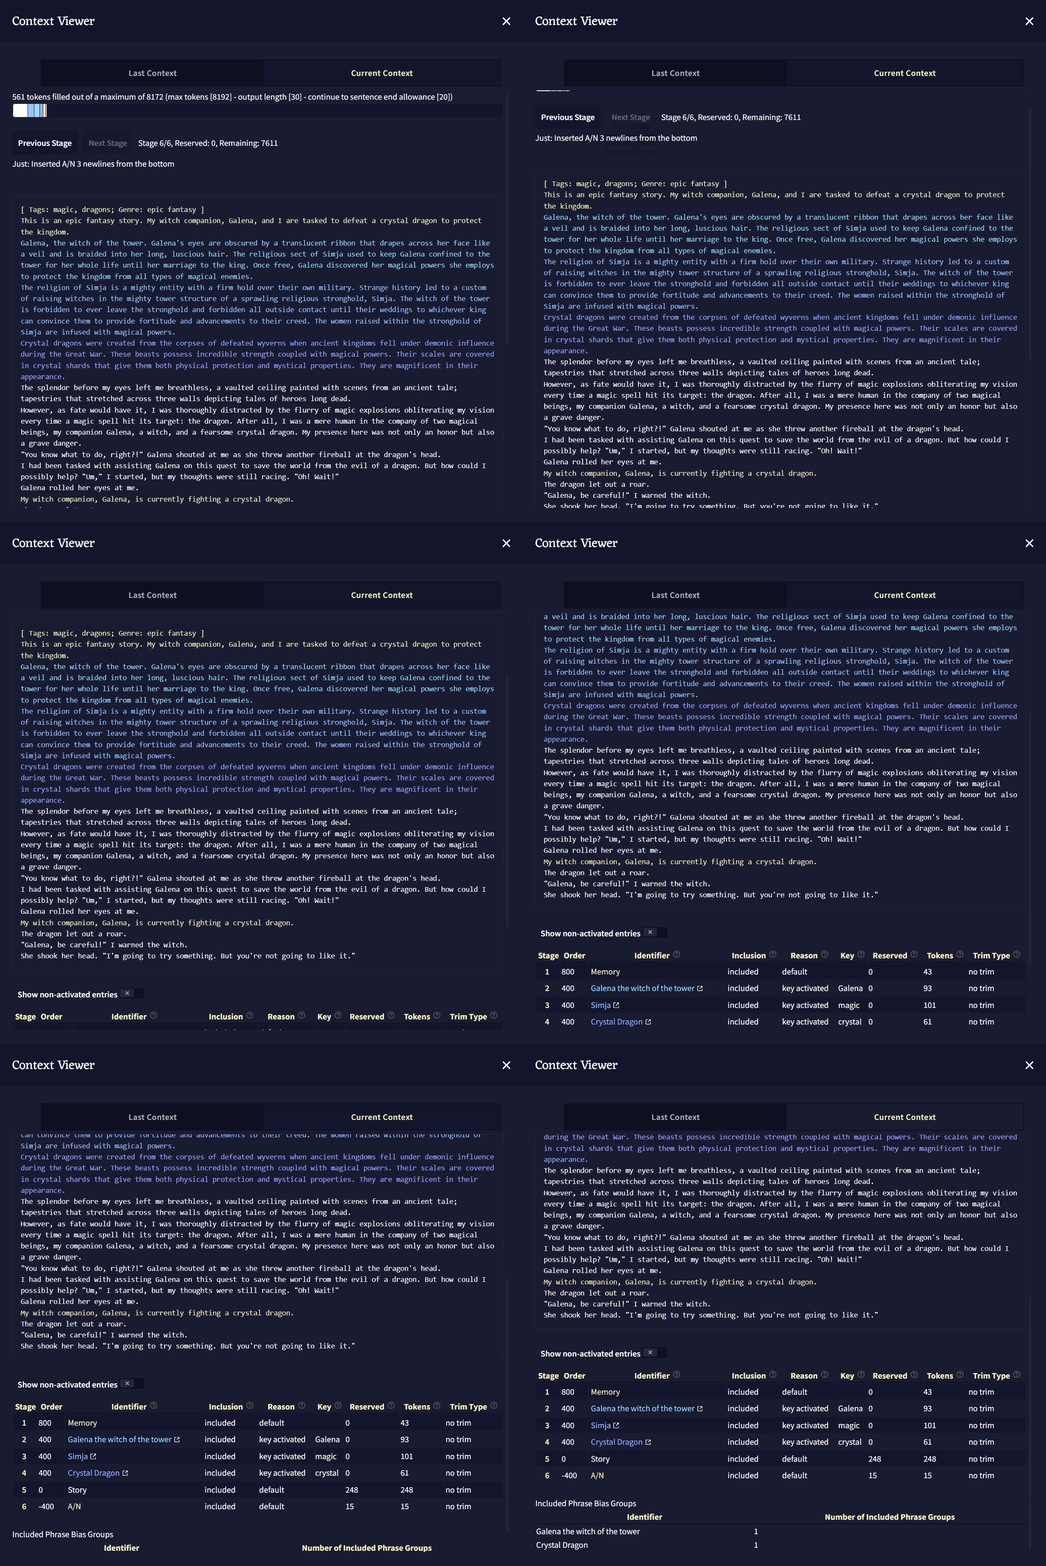
The Context Viewer allows you to view how your stories' Context looks when being sent to the AI for generation. It provides details about how your Lorebook entries, Memory, Author's Note, and Phrase Biases are being handled in your story.

Context Viewer Bar: Much like the one mentioned in the main Context section, this Context Viewer Bar is also a visual representation of the Context of your story in individually colored and labelled chunks. You can also hover over each colored section on this bar to view more detailed information.
Goose Tip: The maximum size of your context depends on your Subscription and can be manually limited in the AI Settings page using the Max Context Size slider.

Stages: When building Story Context out of your active lorebook entries, memory, author's note, and your story text itself, everything is organized and inserted in Stages. Starting at stage 0 and depending on the Insertion Order values set in the Context Settings menu, all the different parts of your story are put together to form the Context of your story. You can use the Next and Previous Stage buttons to view each stage and see where each entry is placed according to Insertion Order.
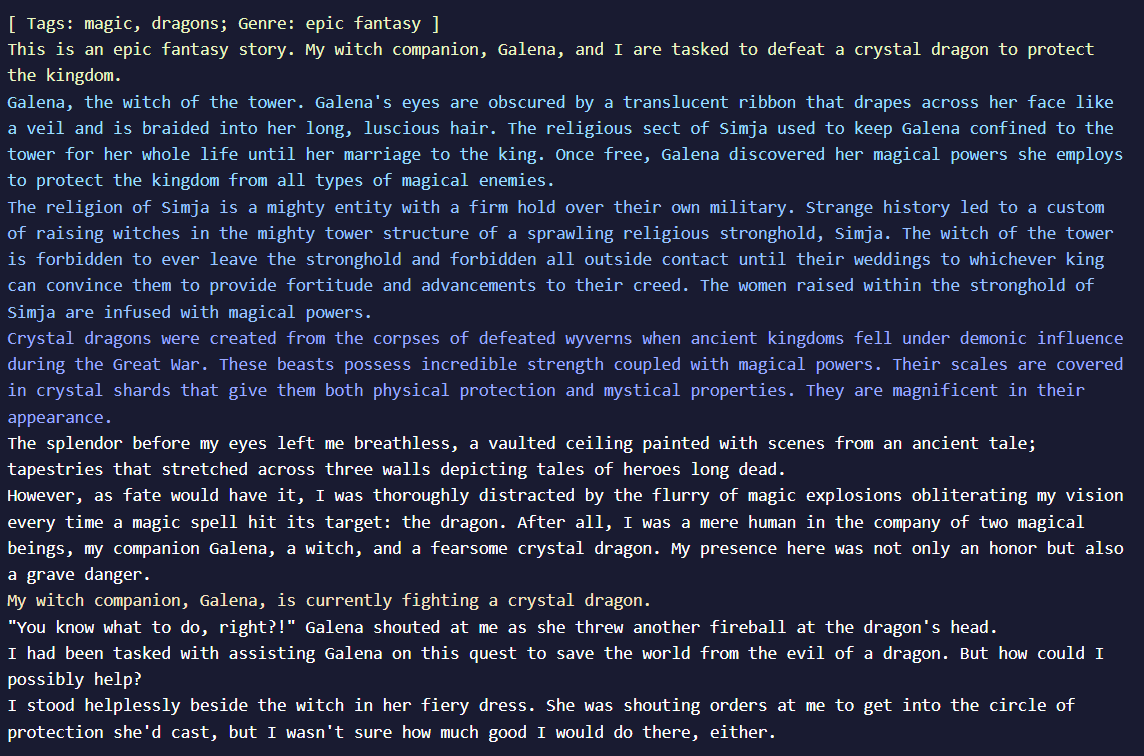
The main Context Viewer window shows the entirety of your context in a scrollable box, and much like the Context Viewer Bar, it is all displayed in different colors depending on its origin.
![]()
The Show non-activated entries toggle expands the Context Viewer Information box below to show all inactive lorebook entries as long as they are enabled.

The Context Viewer Information box is yet another detailed breakdown of your Story Context. This section displays in-depth information about your lorebook entries and Story Settings boxes.
-
Stage: shows which stage the entry was inserted at when building Context.
-
Order: the entries' Insertion Order according to Lorebook or Context Settings.
-
Identifier: the name of the entry as they appear in the Lorebook or Story Settings tab.
-
Inclusion: whether the entry was included in Context or not.
-
Reason: the reason the entry was included or excluded from Context.
-
Key: the entries' activation key, if relevant.
-
Reserved: how many tokens the entry has reserved, according to Lorebook or Context Settings.
-
Tokens: the number of active tokens in the entry.
-
Trim Type: the way the entry will be trimmed to free up space for other entries, according to the settings defined in Lorebook or Context Settings.

Lastly, the Included Phrase Bias Groups section shows any Phrase Biases enabled within active Lorebook entries, with the name of the lorebook entry displayed on the left and the number of phrase bias groups on the right.
Context Settings
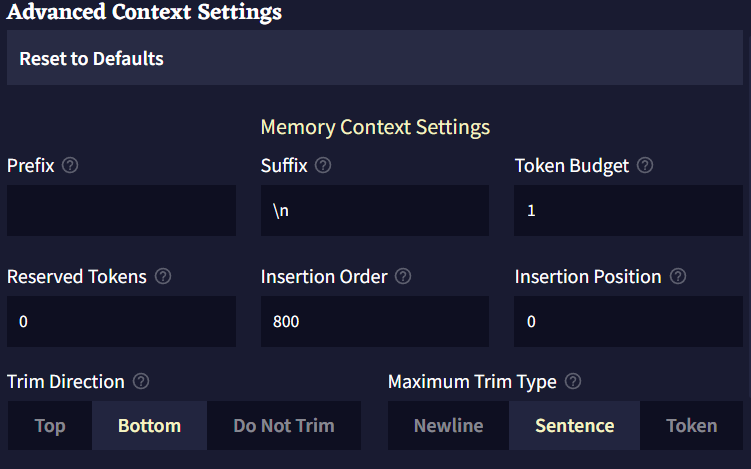
The Context Settings menu contains four similar sections: Memory Context Settings, Author's note Context Settings, Default Lorebook Settings, and Story Context Settings, and a Reset to Defaults button at the very top. Each section has the same settings, other than the Default Lorebook Settings section, which is covered in the Lorebook section.
-
Prefix is text that's added in front of the entry after trimming and before inserting into context.
-
Suffix is text that's added at the end of the entry after trimming and before inserting into context.
-
Token Budget is the maximum amount of tokens of the context the entry may use. Decimal numbers between 0 and 1 (exclusive) will be interpreted as a percentage of the maximum context size (max tokens - output length).
-
Reserved Tokens is the amount of tokens of the context the entry may reserve for itself. All reservations are made before any entries are placed in context. An entry won't reserve more tokens than the amount it actually contains. For example, if reserved tokens are set to 200 and the entry's text is only 100 tokens, then only 100 tokens will be reserved.
Decimal numbers between 0 and 1 (exclusive) will be interpreted as a percentage of the maximum context size (max tokens - output length). -
Insertion Order is how entries are ordered when building the story context. Entries with higher insertion order will reserve tokens and be inserted into the context first. If two entries share the same insertion order, there is no guarantee which will be inserted first.
-
Insertion Position is the location the entry will be inserted into the context. 0 is the very top of the context, 1 is one unit down, 2 is two units down etc. Negative Numbers will count from the bottom of the context starting with -1 at the very bottom, making -2 one unit up, -3 two units up, etc.
-
Trim Direction is where the entry will be trimmed from when the entire entry doesn't fit in the context. If set to 'Do Not Trim' the entry will only be included if the entirety of its text fits within the context.
-
Maximum Trim Type is the extent to which the entry is allowed to be trimmed.
-
Insertion Type determines what units will be used to separate the context when inserting entries.
Ephemeral Context Settings
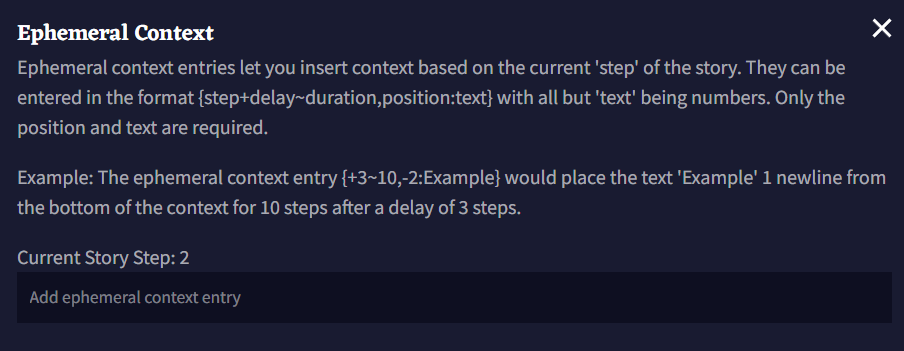
Ephemeral Context entries, as depicted in the image, allow you to insert text into your Context based on the current Story Step(visible under View Story Stats in the Story Settings Tab). In the example Ephemeral Context entry, depicted in the image above, and in the box below, the structure of the entry is broken down into four parts: Delay, Duration, Insertion, and the entry's Text.
Ephemeral context entries must be surrounded in curly braces, { and }
-
Delay
The Delay is the first number in any Ephemeral Context entry, and can be preceded by a
+or-symbol to specify positive or negative steps in the story. Set the delay to+0to have an entry activate immediately, and add anrafter the number to allow the entry to repeat after the Duration is met. Keep in mind that an entry with a longer Duration than Delay will continue to loop once active, so make sure to set the Delay longer if you want an entry to trigger intermittently. In the example above, the Delay would be+3, this specifies that the entry will activate in three Story Steps. -
Duration
The Duration of the entry, always preceded by an
~symbol, specifies how many Story Steps it will stay active for. In the example, the duration would be~10, meaning the entry would stay active for 10 story steps after it activates. -
Insertion
The Insertion value is always preceded by a
,and placed after the Duration value. You can use a+or-before the number to specify the entry's insertion position, with0being the top of context and-1being the bottom. In the example, this means that the text would be inserted one newline up from the bottom of your story context. -
Text After the Insertion value, the text of your Ephemeral Context entry must be preceded by a
:. Do not space the entry text unless you intend for it, as everything between the:and}will be inserted verbatim.
To summarize, the example listed at the start of this section would insert the text Example one newline from the bottom of context, for 10 story steps, in 3 story steps after the entry is created.
Goose Tip: Has your character picked up a cursed object? Does an enemy return at random intervals to put your heroes in peril? Ephemeral context can be used for that and more!
Phrase Bias
Phrase Bias allows you to increase or decrease the chance for certain words or phrases to be generated by the AI when the entry is active. Surround biases with {curly braces} to input exact text. Surround biases with [square brackets] to input token IDs (tokenizer specific). Biases are case-sensitive.
To make a phrase bias, type in the text area, then press enter to save.
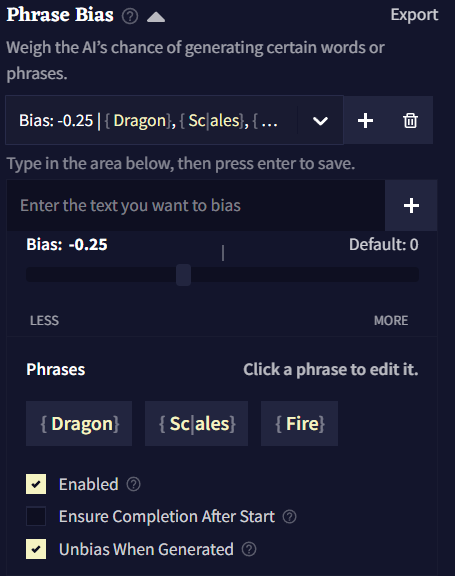
You can import and export phrase biases as a .bias file by clicking on the Import and Export buttons.
Biases are organized in groups, each with its own Bias value, which is applied to all tokens and phrases inside it. You can have several groups of phrase biases in a single lorebook entry.
To create a new bias group, click the Add button. The currently selected group can be deleted with the
Delete button.
Bias Value represents how much the group of tokens is being biased
The effect of Bias Value varies wildly depending on the AI Model you're using. For example, Krake is much more sensitive to biases compared to other models, so a good rule of thumb is to use decimal values.
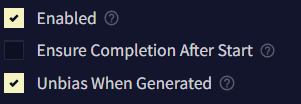
Enable is used to toggle whether the bias is enabled or disabled.
When Entry Inactive reverses the group's activation behavior. When enabled, this bias group will be applied when the entry is inactive instead of when active.
If Ensure Completion After Start is enabled, when the first token of a phrase is generated, subsequent tokens will always generate.
If Unbias When Generated is enabled, after a phrase is generated, its bias will be removed for the rest of the generation. This will not prevent it from being generated, only remove the bias placed on it.
Banned Tokens
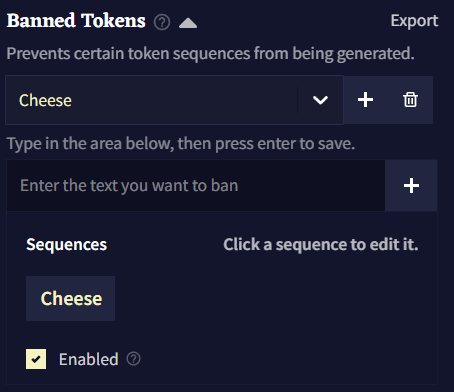
The Banned Tokens section allows you to completely ban a token or sequence from being generated by the AI. Surround biases with {curly braces} to input exact text. Surround biases with [square brackets] to input token IDs (tokenizer specific). Text entered here is case-sensitive.
Goose Tip: When banning tokens, the AI may sometimes try to work around a ban or bias with alternate spellings. Try not to forget anything important when creating a new ban sequence!
Ban Bracket Generation

The Ban Bracket Generation toggle prevents the AI from generating the [ and ] brackets. Turning this off may be useful for generators or RPGs!
Stop Sequences
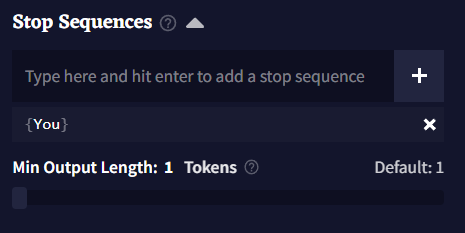
Entering a token or word in the Stop Sequences box makes generation stop when that character appears. The Min Output Length slider below determines how long an output must be before any Stop Sequences are triggered.
Duplicate and Start as Scenario

The Duplicate and Start as Scenario button creates a duplicate of your current story, with the Lorebook and settings included, and starts it as if it were a new scenario being imported. If placeholders are present, they will be active in the following popup, making this a useful button to test out scenarios you plan on sharing or replaying!