Introduction
There's a newcomer to the Sampling slider family, and it's CFG, or Classifier Free Guidance! This exciting new experimental sampling method is capable of making your outputs more vibrant and on-topic than ever before, but requires careful usage for best results. Advanced users, get ready for your next tinkering effort!

Mechanics
So what's going on under the hood when you decide to drop CFG into your Sampling order? We'll expand on everything more in a moment, but in short, CFG generates a pair of hidden outputs: one 'opposing' and one 'neutral', then calculates the difference between them to guide a third and final output which is given to you in the Editor. If your outputs feel slower with CFG enabled, this multi-pass behavior is why.
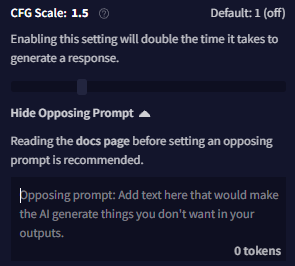
Getting into the details, you'll notice that once you enable CFG in the "Change Settings Order" modal (Options Sidebar -> Sliders Tab -> Sampling Section) or load a preset where CFG is enabled, there will be two elements: a slider labeled "CFG Scale: " and a text box. To explain how this slider and text box work together, let's investigate what happens when we set the slider to some medium-strength value—say, 1.6—and leave the text box blank, then generate some text in the Editor.
As a quick recap, generation with CFG begins with two hidden outputs, then a third output which you receive. In reality, this is done on a token-by-token basis, not all at once, which is how you still get streamed outputs when using CFG! So for each token, the model first generates hidden token probabilities with no context except what you entered in the CFG Text Box. This is your opposing output. Then, the model generates other hidden token probabilities with all of your story's context, like it normally would. This is your neutral output. CFG takes both of these outputs and compares the differences between their potential token choices.
So in our example, the model first generates output as though it were on an empty story (due to our empty CFG Text Box), then generates an output for our current story and its context. The difference between these two outputs is found, scaled by a factor of 1.6, and then used to select the third 'true' output which appears in the Editor. This is your final output. That means the token choice tries to be 1.6x as specific to your story. In practice, this process depends on the accuracy of probabilities generated in two completely unrelated contexts, which can be poor. So it creates more noise as CFG increases. Now let's talk about the CFG Text Box.
Goose Tip: Remember that this is all done token-by-token. So there's really no such thing as a hidden "reverse output" to your final output, just a bunch of loose probabilities for each token.
The CFG Text Box (Opposing Prompt)
Note that leaving the CFG Text Box empty is the intended usage mode, since it makes CFG accentuate the difference between the AI's default prose and the style of your story for more accurate outputs. But the box is there for a reason, so what happens if we give it some content?
For this example, let's suppose we added Suddenly, I felt a sharp pain in my side. to the box.
This time, when our opposing output is generated, it will be the same response the AI would give if you had it generate on a blank story which contained nothing except Suddenly, I felt a sharp pain in my side.. Then this response is weighed against the neutral output and magnified by the CFG Scale for your final output just like last time. With the right input to the CFG Text Box, you can get the AI to avoid certain topics, styles, behavior patterns, and so on! Like any other NovelAI feature, careful experimentation is key.
In addition, CFG Scale values do not behave predictably across different use-cases like other slider values, such as Randomness or Tail-Free Sampling values. Changing your context size, output length, or other sampling values can quickly make useless what was previously a well-adjusted CFG Scale value. Keep this in mind when using presets such as our Amber Zippo, or others you discover from the community which utilize CFG sampling!
If primary sources are your jam, and you can handle a lot of Greek in your math, check out the original CFG paper for more insight into how everything works.