Multi-Character Prompting
A unique feature only found on our V4 models or higher, is the ability to prompt for multipe characters in one image. With V5 being able to go up to twenty-two different characters, while V4 can go up to six.


This works by separating the prompt into a single base prompt and multiple character prompts.
The base prompt determines the scene, style, and so on of the image. The character prompts allow you to describe each character in your scene in a way that minimizes information leakage.
There are two ways of using Multi-Character Prompting. The first and recommended way is to click on the big + button in the Character Prompts section below the prompt box. This will add a new prompt box just for the character. Clicking into it allows you to type in that specific character’s prompt.
Goose Tip: If you find that something does leak from one character prompt to the other, you can use the character’s Undesired Content field to prompt against it, just like you would on a normal prompt.
When placing characters into the scene, the AI will usually follow the order in which your character prompts are listed, following a top to bottom, left to right scheme.
For example, if you have two characters and the side-by-side tag, the character in your first prompt will usually appear on the left, while the one in the second prompt will appear on the right side of your image. You can quickly change the order of your character prompts by clicking the up and down arrows at the upper right of each character prompt box.

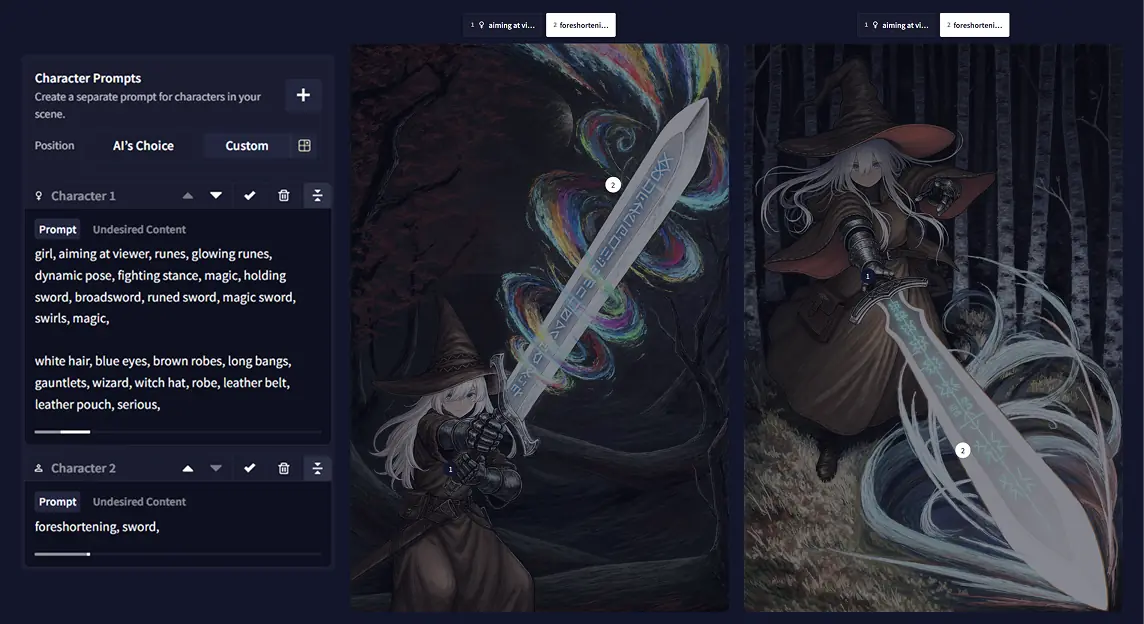
Additionally, you can indicate where in the image you want your characters to appear. To make use of this feature, you need to have at least one character prompt set up. Change the position from AI’s Choice to Custom in the character prompts section. Then, you can click on the  Character Positions button, which will open up a canvas where you can freely position your character prompts, and the model will closely follow the positions you set.
Note: The V4 and V4.5 models are limited to a 5x5 grid for custom character positioning.
Goose Tip: For better results, it is best if the positions you set do not conflict with the order of your character prompt boxes and are also reinforced with natural language prompting.
Goose Tip: Character Positioning isn’t just good for positioning characters, it’s also possible to use it to set the positions of objects. Though this may require more careful prompting or some reinforcing with natural language.
Another thing that should be noted is regarding the subject count tags (e.g. 1boy, 2girls, 3others, and so on). These tags should always go into the base prompt (e.g. 2girls, 2boys, outdoors), then in each character prompt, just specify girl, boy, or other, without a number to let the model know how to draw the character (e.g. girl, purple hair, ... or boy, blonde hair, ...) described in the given character prompt.
If using separate prompts for each character seems too cumbersome, an alternative way of doing Multi-Character Prompts is by using the | character in your prompt to separate the base prompt and character prompts. Prompt mixing is not available on V4, so the | character is used for this purpose instead. Note that it is NOT possible to mix the | prompt syntax with the character prompt boxes. If any character prompt box exists, the | syntax is disabled.
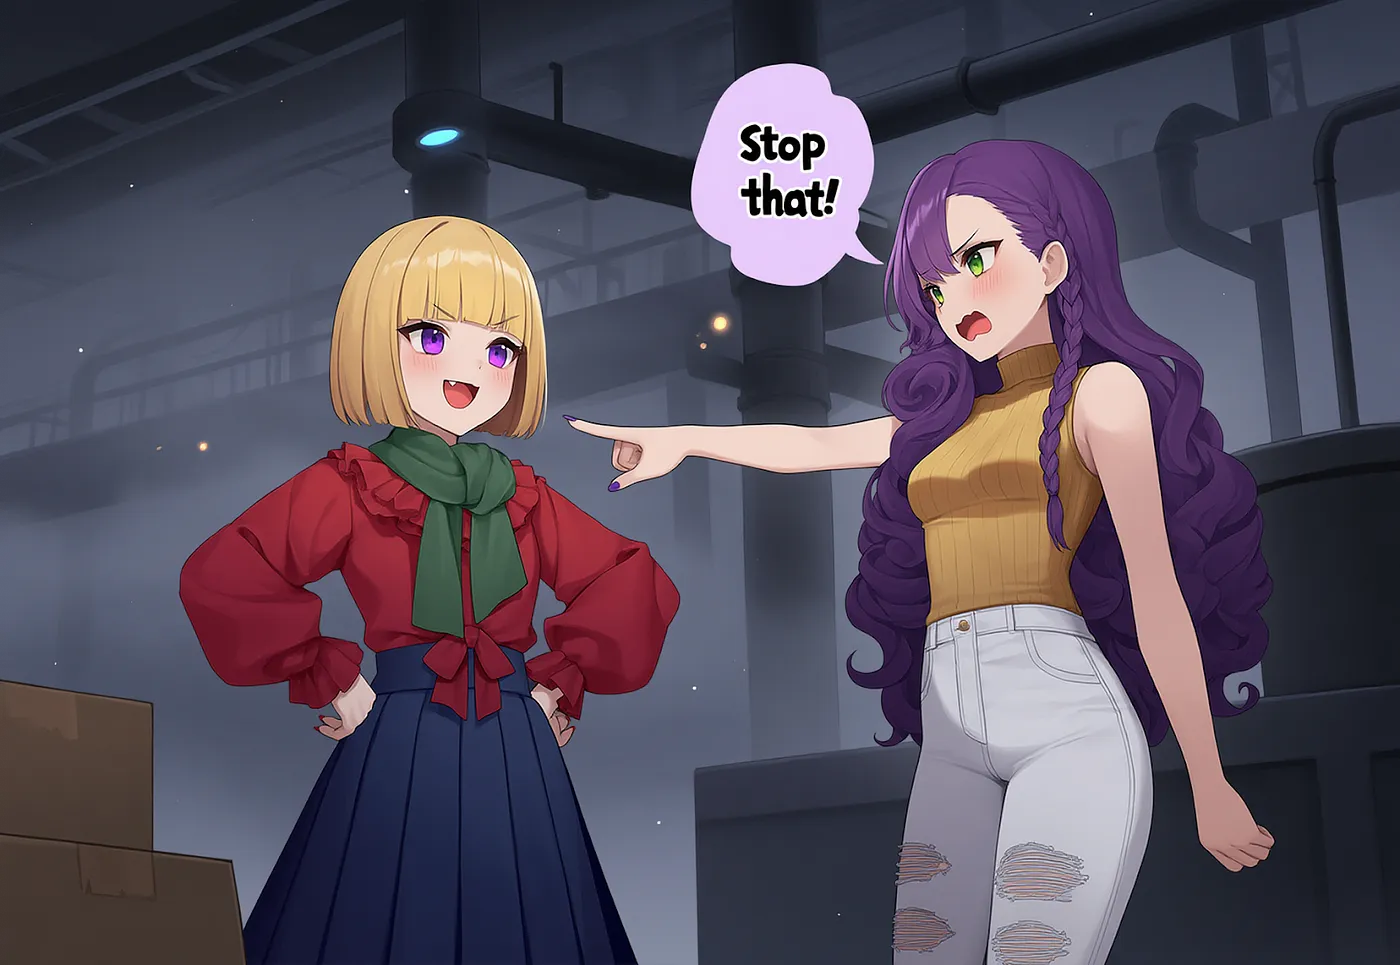
An example prompt using this syntax could be:
2girls, indoors, factory, night, fog, industrial lights, pipes, light particles, cardboard box, aesthetic, best quality, english text, text | girl, purple eyes, short hair, smile, open mouth, ruffled blouse, red blouse, pleated skirt, blonde hair, green scarf, hands on own hips, blunt bangs, blue skirt, medium skirt, small breasts, bob cut, target#pointing, long sleeves, red nails, fang, cowboy shot. She is being pointed at. | girl, very long hair, purple hair, curly hair, white jeans, white pants, golden shirt, cowboy shot, green eyes, turtleneck sweater, sleeveless turtleneck, side braid, medium breasts, sleeveless, ripped jeans, wavy mouth, blush, purple nails, open mouth, source#pointing at another, speech bubble. She is pointing at the other girl and scolding her. Text: Stop that!
Action Tags
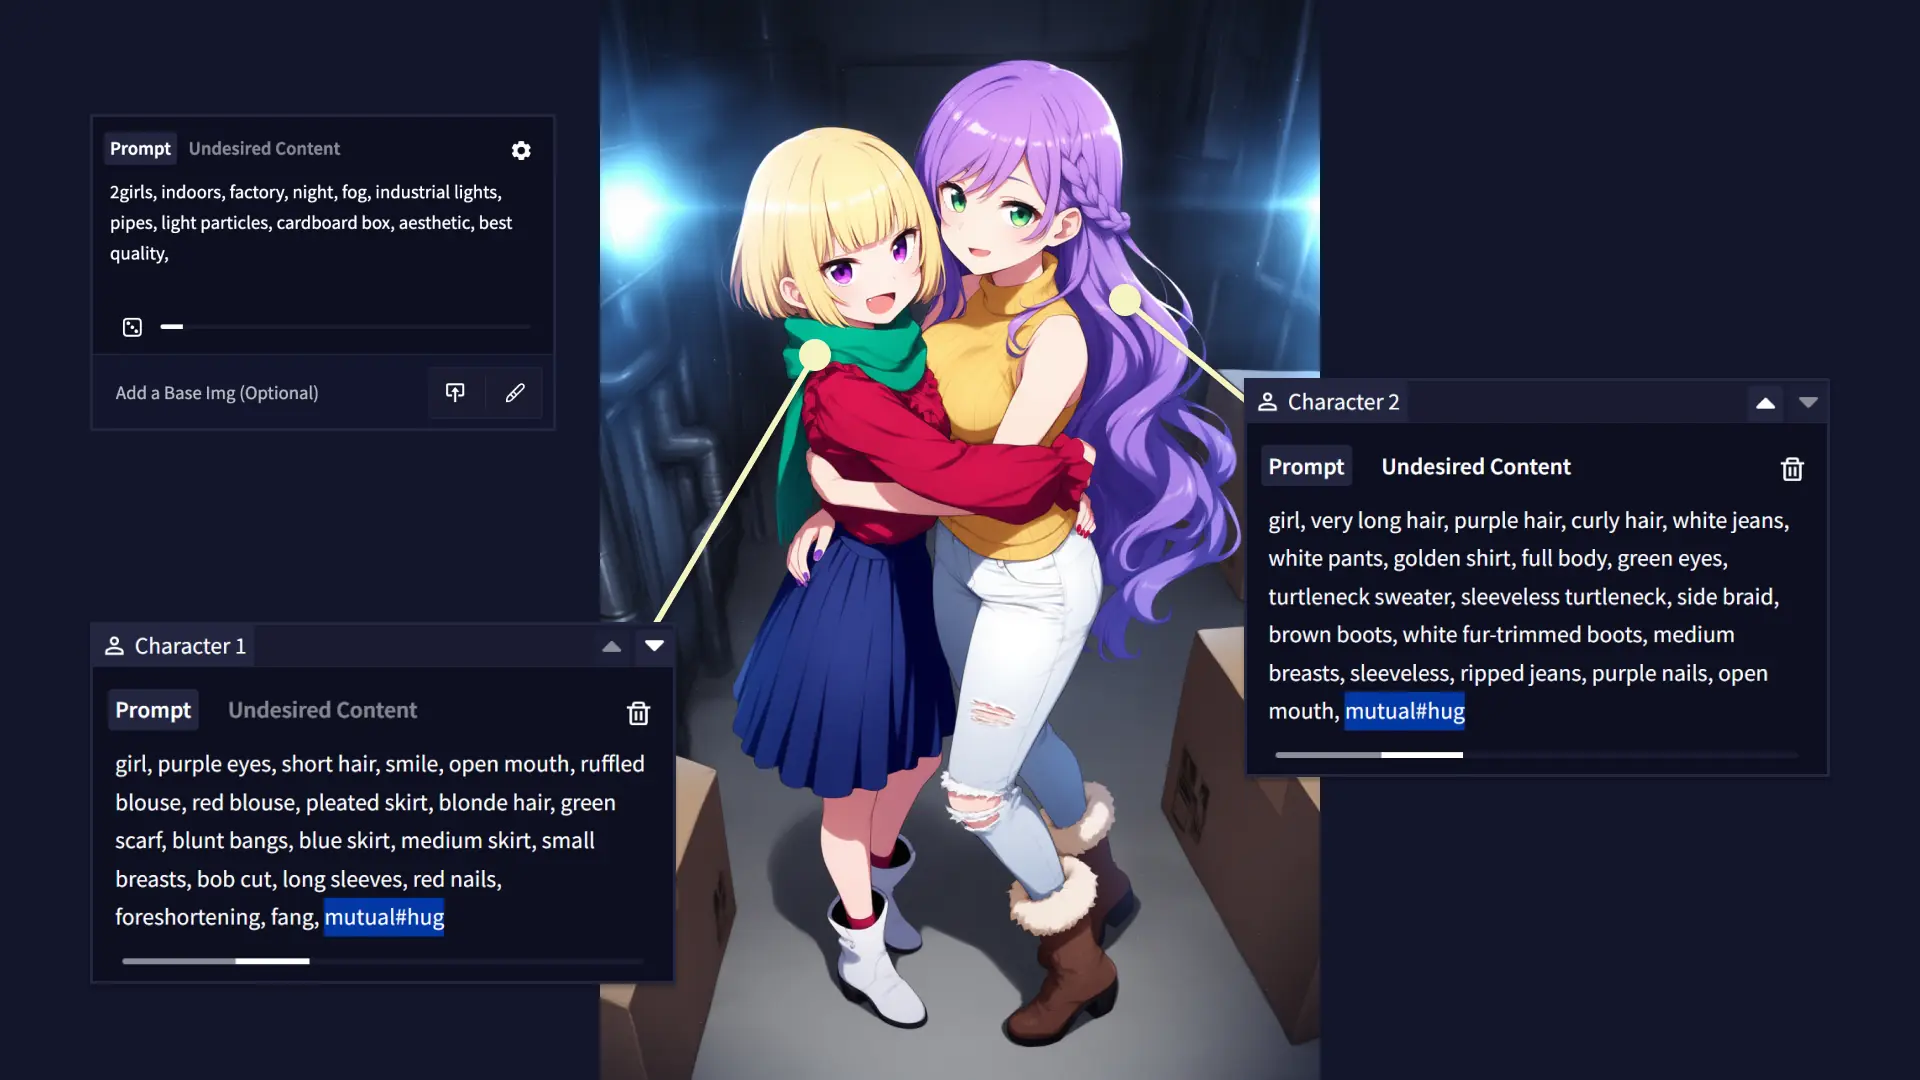
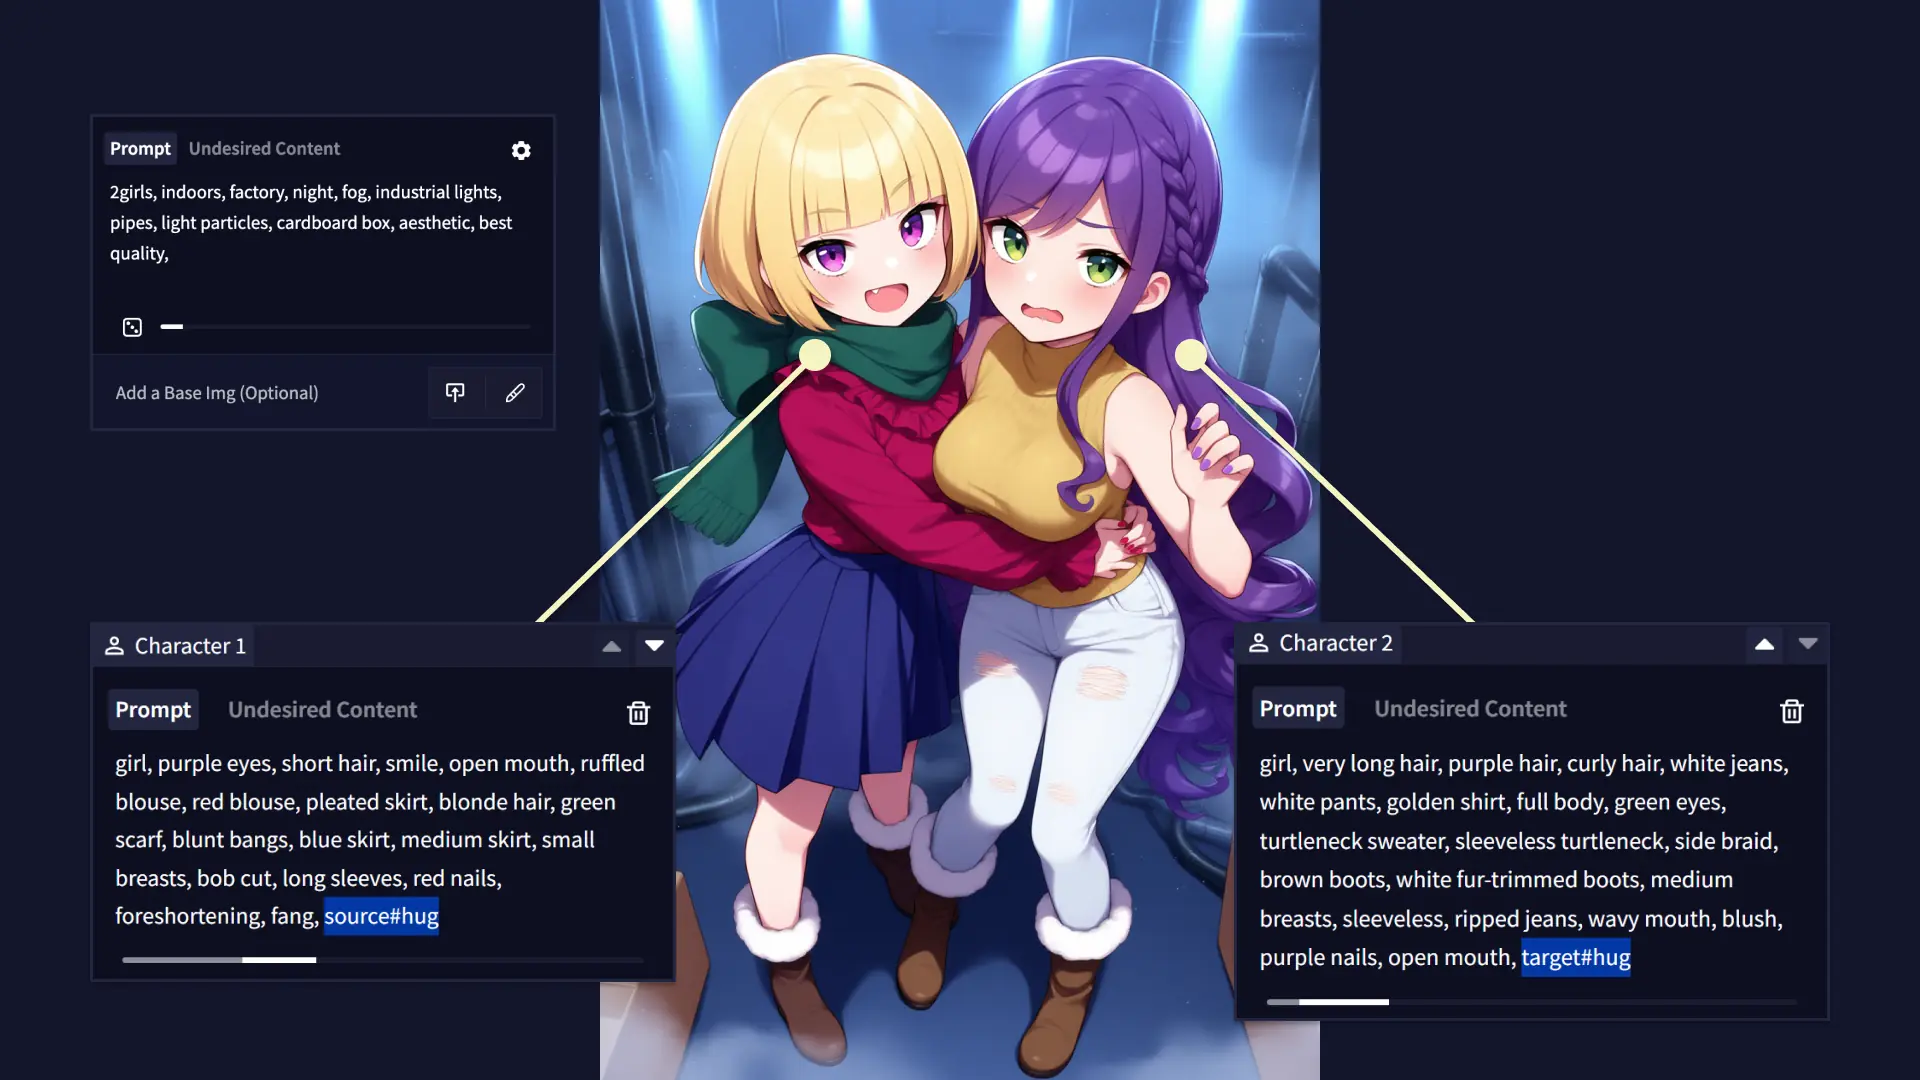
When multiple characters interact, you can use a special syntax on action tags in each character’s prompt to specify who the active and passive parties are by prefixing an action tag like hug with either source#, target# or mutual#.
For example, if one character is hugging another, on that character you could specify the source#hug tag. On the character that is being hugged, you would then specify the target#hug tag. If the characters are hugging each other, you can, on both sides, use the mutual#hug tag.
Note that this syntax is not always reliable, but it can be helpful in many cases.