Canvas
Canvas / Paint New Image / Edit Image
Not only can you upload images, but you can also draw an image and subject for the AI to generate (or customize it, but let’s cover creating one from scratch first!)
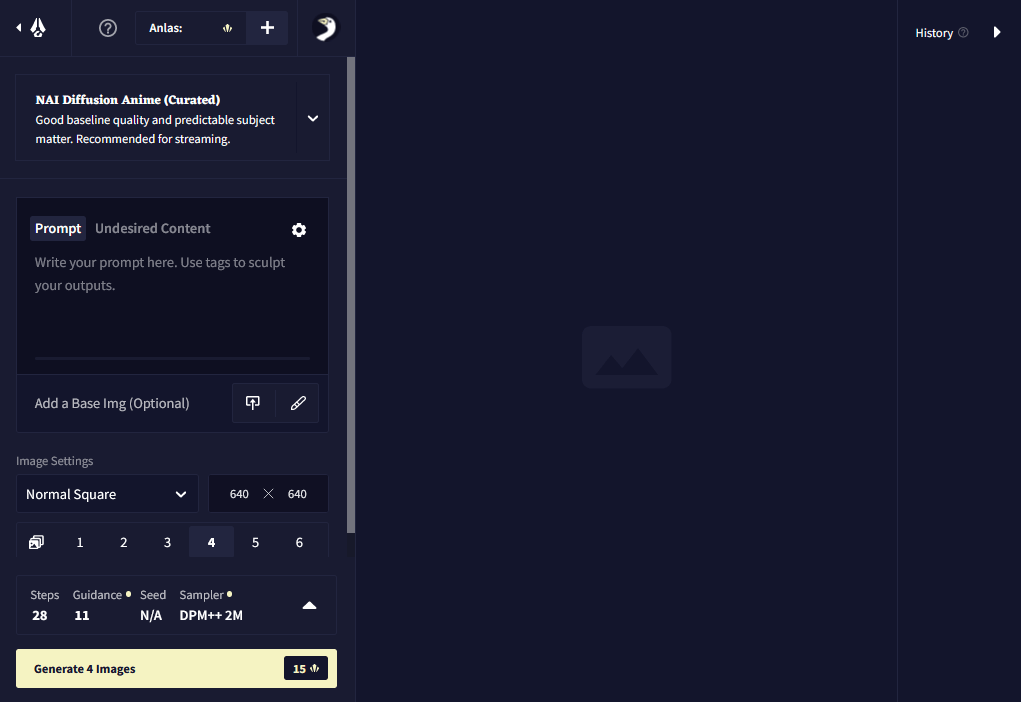
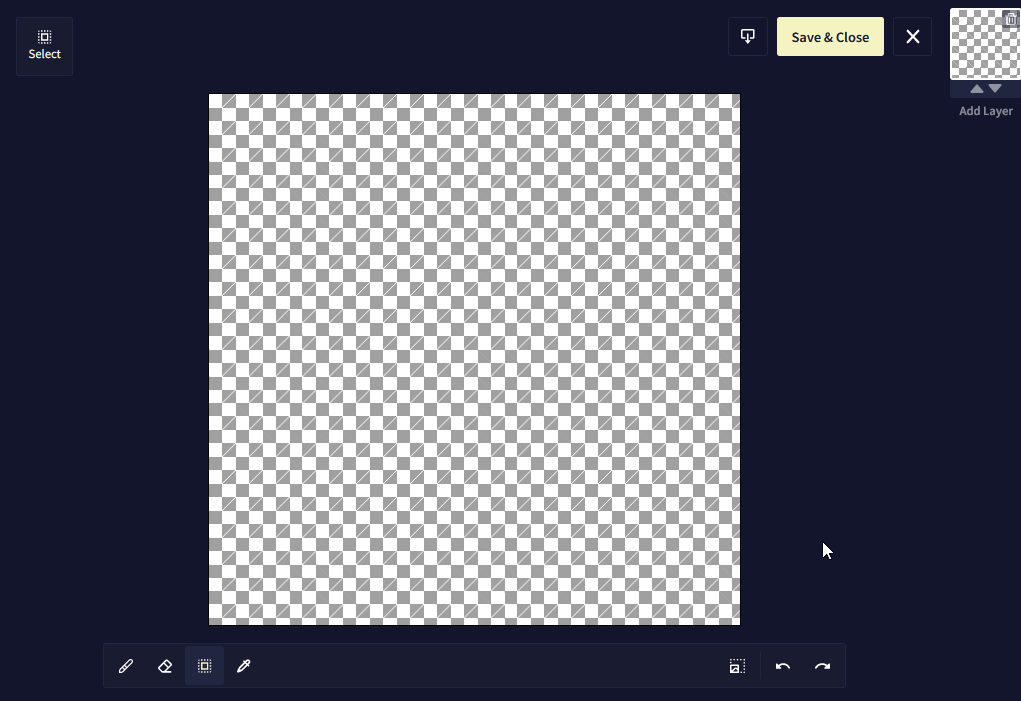
Click the Paint New Image button under your prompt bar. This opens our Canvas and removes the need for you to use external painting software. (You always have the option to upload images created with external sources, though!)
There are a few handy tools that you can use while editing in the Canvas:
- Draw: The Pen Tool
- Erase: The Erase Tool
- Fill: The Fill Tool
- Select: The Select Tool
- Lasso: The Lasso Tool
- Color Picker: The Color Picker
- The Color Palette
- Blur: The Blur Tool
- Clone: The Clone Stamp Tool
- Pen Size
- Pen Shape
- HSV Adjustment
- Resize Canvas
- Undo & Redo
- Download File
- Save & Close
- Cancel
- Zoom
- Layers
- 3D Model Layers
- Hotkeys
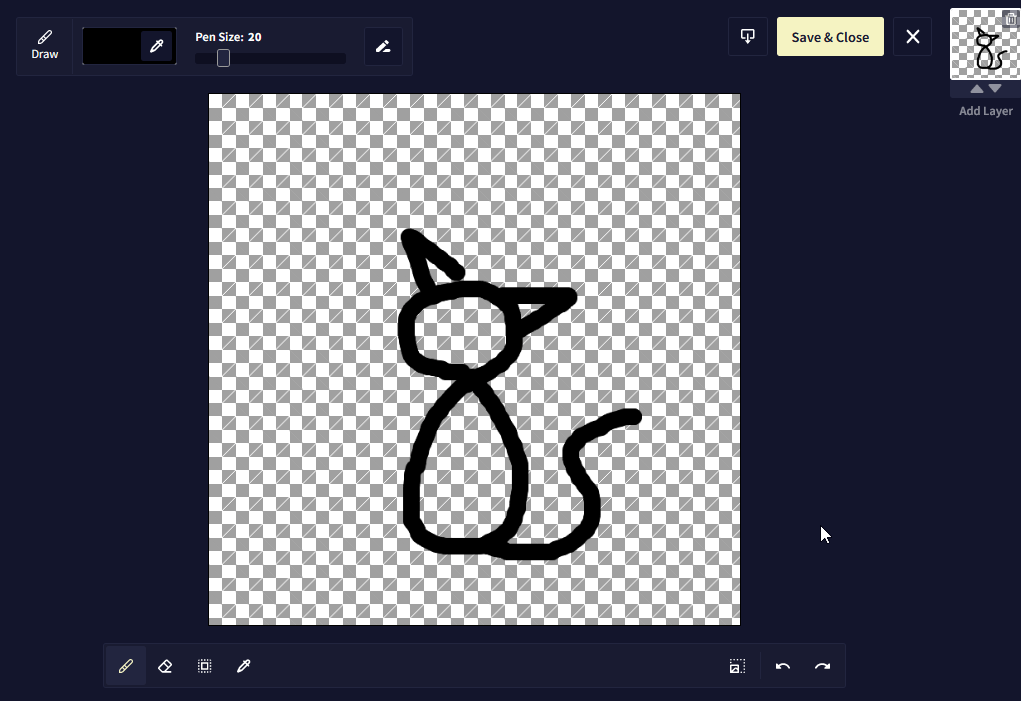
Draw 
With Draw you can create your drawn guide for the AI directly on your Canvas, on top of an uploaded image or previous image generation.
If you don’t like the size of the Pen tool, you can adjust it with the Pen Size slider located on the right.
You can choose to draw with either a Round tip, a Soft Round tip, or a Square tip. Additionally, you can toggle Pressure Sensitivity if you’re using a stylus.
Erase 
With Erase you can remove anything from your drawn guide.
If you don’t like the size of the Erase tool you can adjust it with the Pen Size slider located on the right.
You can choose to erase with either a Round tip, a Soft Round tip, or a Square tip. Additionally, you can toggle Pressure Sensitivity if you’re using a stylus.
Fill Tool 
Fill allows you to quickly fill in with your selected color. You can also adjust the tool’s Tolerance using the slider.
Select Tool 
Select allows you to freely draw a rectangle you can move around anywhere on your Canvas. You can also scale and rotate your selection. Holding shift while changing the scale will maintain the original proportions of your selection. Holding alt will scale from the center of the selection instead of the edges.
Lasso Tool 
Lasso allows you to freely draw a shape you can move around anywhere on your Canvas. You can also scale and rotate your selection. Holding shift while changing the scale will maintain the original proportions of your selection. Holding alt will scale from the center of the selection instead of the edges.
Color Picker 
Pick a color from anywhere on your picture. This allows you to swiftly grab a color from any area of your image removing the need to guess the right value on the Color Palette.
Color Palette
Select a Color of your choice by clicking anywhere on the Color Palette.
Blur Tool 
With Blur you can soften parts of your image. You can also adjust the Pen Size, the Intensity, and toggle Pressure Sensitivity.

Clone Stamp Tool 
With Clone Stamp you can duplicate details or fix small imperfections. To use the Clone Stamp tool, you must first alt+click somewhere in your image to set the source.
If you don’t like the size of the Clone Stamp tool you can adjust it with the Pen Size slider located on the right.

Pen Size
Adjust the size of your Pen by editing the Pen Size slider or clicking the size number and entering a number value of your choice.
Pen Shape
Adjust the shape of your Pen from either a Round tip, a Soft Round tip, or a Square tip. Additionally, you can also toggle Pressure Sensitivity if you’re using a stylus.
HSV Adjustment 
You can quickly adjust the Hue, Saturation, and Brightness of your image.
Resize Canvas
Adjust your Canvas size quickly by changing the Size values, or use the Shift Edges fields to add or subtract pixels from chosen directions.
The clickable Crop to closest valid generation size button atuomatically sets the values to adjust the base image’s resolution to match the closest resolution that is supported to be output by the AI.
You can also just quickly resize the canvas by clicking and dragging the edges.
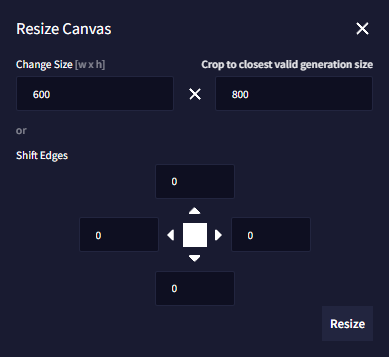
Goose Tip: If your Image2Image generations look “stretched” compared to the base image, it probably means the original’s resolution doesn’t match the ones supported by the AI. Use the Crop to closest valid generation size button to fix that!
Undo & Redo
The Canvas records every modification to your Canvas image, so you can always Undo & Redo your changes if you wish to do so.
Download File
Export the current Canvas file. You can Download your newly drawn or edited Canvas at any time by using the Download File button. Keep in mind that Image Generation is session-based and all data is lost upon exiting or reloading, so backing up a Canvas file allows you to use your Canvas image as a file for the Upload Image option in the future.
Save & Close
Confirm all changes to the Canvas and return to the Image Generation menu. This will close the Canvas and let you use the final drawing for Image2Image generations.
Cancel
Cancel all changes to the Canvas and return to the Image Generation menu. This will discard all changes made and return you to the Image Generation menu.
Zoom
You can Zoom in and out while editing with your mouse wheel.
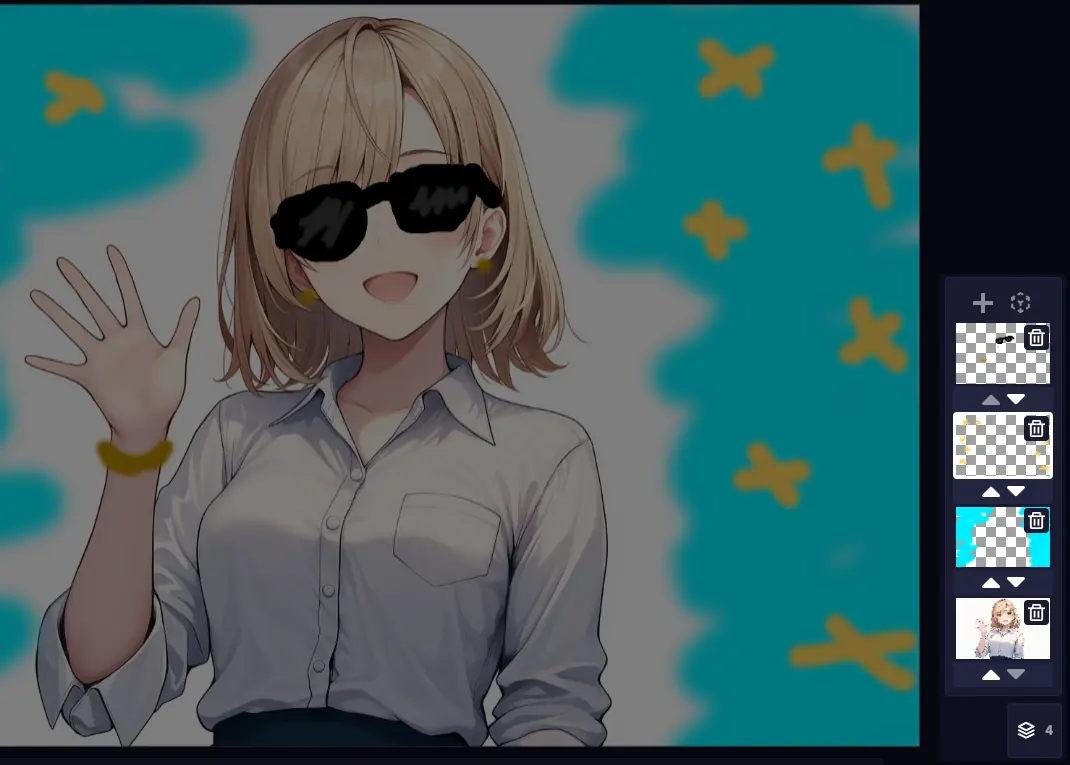
Layers
The Canvas supports editing on multiple Layers. You can use Layers to make edits that do not affect the original image. You can also click on the arrows below each layer to bring them over or under one another.
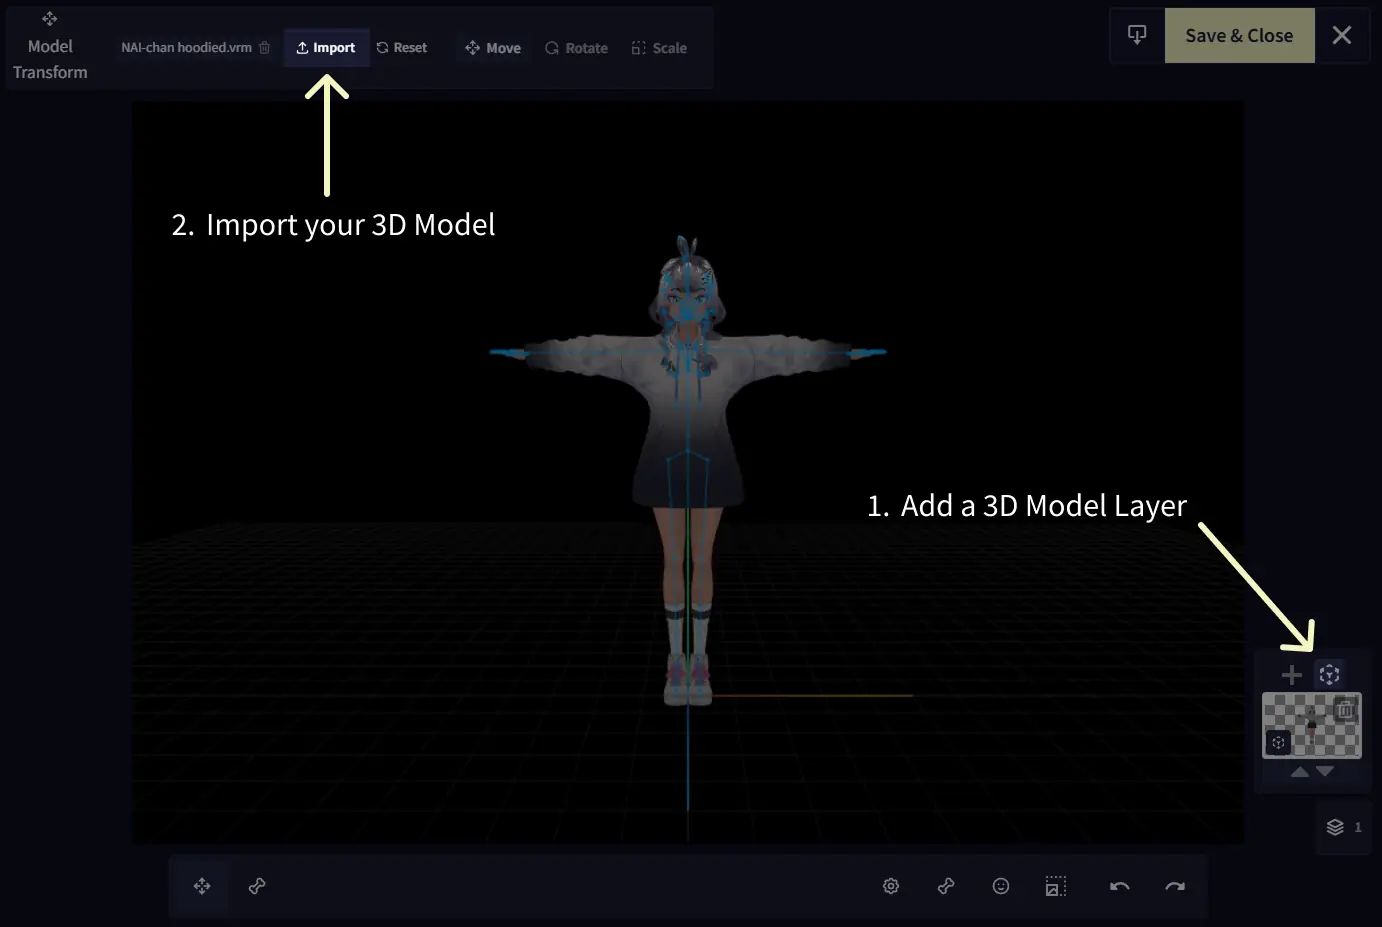
3D Model Layers
You can also add 3D Model Layers, where you can import and pose 3D models directly in the Image Generation Canvas. This allows you to use 3D references for composition, anatomy, or scene layout.
To do this, first add a 3D layer by clicking the Add 3D Model Layer button on the layers panel. Then click on the Import button in the top left.
Supported file types are:
.glb, .gltf, .pmd, .pmx, and .vrm
If your model uses external resources like textures, make sure to upload all files together as a single .zip archive.
When working with 3D models, there are two main selection modes: Model Transform, and Pose.
Model Transform will affect the entire model. You can Move, Rotate, and Scale the 3d model.
Pose will let you select individual bones in your model. Using this along with the Rotate tool will let you pose your character in any way you want. You can also Move and Scale each bone.
How to generate based on an image drawn with the Canvas:
-
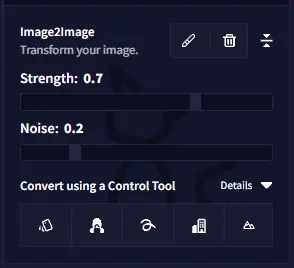
Play around with the Strength & Noise of your next generation: If you use large sections with only one color, you need to up the Noise setting accordingly to provide the AI with some working ground to come up with texture details.
-
Don’t want to change much? Lowering both Strength and Noise sliders results in fewer changes to your original image. Now you can use Enhance or play around with the other settings!
Goose Tip: Alternatively, if you want to use the written prompt to add something that isn’t in the initial doodle, a high Strength value makes it easier to happen. Like the “red dress” in the demo earlier in the page!
- Consider your text prompt: It is crucial you consider the text you write alongside the next generation. We’ve seen very good results if you accurately describe your image alongside what transformation you plan to give it.
If you want the AI to consider the text input more, then try to up the Prompt Guidance as well as the Strength sliders accordingly. Test different slider strengths at lower steps to get a good preview for what the AI is doing with your work and chosen settings - sometimes as little as 10~15 steps can give a good preview and sense for what you are attempting.
Hotkeys
Here’s a couple of hotkeys you can use while inside the canvas:
- Ctrl + Left Click - Quick Color Picker
- b - Draw Tool
- e - Erase Tool
- g - Fill Tool
- s - Select Tool (Focused Area Selection when Inpainting)
- l - Lasso Tool
- c - Color Picker Tool
- r - Blur Tool
- j - Clone Stamp Tool
- Mouse Wheel - Zoom in or out in the canvas
- Middle Mouse Drag - Move canvas position
- [ or ] - Change brush size
- Hold Shift - Maintain aspect ratio when scaling selection
- Hold Alt - Scale from the center of the selection instead of the edge
3D Mode hotkeys:
- t - Model Transform
- p - Pose
- q - Move camera up
- e - Move camera down
- w - Move camera forward
- s - Move camera backward
- a - Move camera left
- d - Move camera right
- Left Click - Rotate camera
- Right Click - Free Move camera
- Mouse Wheel - Zoom camera in or out
- Middle Mouse Drag - Move camera forward or backward